


A leaking car wheel brake caliper can be a serious issue that compromises the safety and performance of your vehicle. As a professional car wheel brake caliper supplier, I've encountered numerous cases of leaking brake calipers and have helped many customers resolve this problem. In this blog, I'll share some practical steps on how to fix a leaking car wheel brake caliper.
Understanding the Brake Caliper
Before diving into the repair process, it's essential to understand the basic function of a brake caliper. The brake caliper is a crucial component of the disc brake system. It houses the brake pads and pistons. When you press the brake pedal, hydraulic pressure is applied to the pistons in the caliper, which then squeeze the brake pads against the brake rotor, creating friction and slowing down the vehicle.
A leaking brake caliper usually indicates a problem with the seals or the caliper body itself. The seals can wear out over time due to heat, moisture, and general use, allowing brake fluid to leak out. A damaged caliper body, such as a crack or a hole, can also cause leaks.
Step 1: Safety First
Safety should always be your top priority when working on your vehicle's brakes. First, make sure your vehicle is parked on a flat, stable surface and engage the parking brake. Wear appropriate safety gear, including gloves and safety glasses, to protect yourself from brake fluid, which can be harmful if it comes into contact with your skin or eyes.
Step 2: Identify the Leak
The next step is to identify the source of the leak. Start by visually inspecting the brake caliper. Look for signs of brake fluid on the caliper, brake pads, or the wheel. A tell - tale sign of a leaking caliper is a wet or greasy appearance, often accompanied by a dark, sticky residue.
If the leak is not immediately obvious, you can use a piece of white paper or a clean cloth to wipe around the caliper. If there's brake fluid present, it will show up on the paper or cloth. You may also notice a decrease in your brake fluid level in the master cylinder reservoir.
Step 3: Gather the Necessary Tools and Parts
Once you've identified the leak, you'll need to gather the necessary tools and parts for the repair. The tools you'll typically need include a socket set, a brake bleeder wrench, a C - clamp, a brake fluid catch basin, and a torque wrench.
As a brake caliper supplier, we offer a wide range of high - quality replacement parts. For example, we have the 19 - B6271 Suitable For Sorento Left Rear Caliper, which is designed to fit specific vehicle models perfectly. If you own a Toyota, our Toyota Exclusive Left Front Caliper is an excellent choice. And for Cadillac Escalade owners from 2002 - 2006, our Front Brake Calipers with Brackets (18 - B4728, 18 - B4729) are a great option.
Step 4: Remove the Caliper
Before removing the caliper, you'll need to relieve the pressure in the brake system. Loosen the bleeder valve on the caliper slightly to let some brake fluid out into the catch basin. This will prevent the brake fluid from spraying out when you remove the caliper.
Next, use your socket set to remove the bolts that hold the caliper in place. Carefully lift the caliper off the brake rotor and hang it from the suspension using a piece of wire or a bungee cord. Be careful not to damage the brake line connected to the caliper.
Step 5: Disassemble the Caliper
Once the caliper is removed, you can disassemble it. Use a C - clamp to compress the piston back into the caliper bore. This will make it easier to remove the caliper from the brake pads and also prepare the caliper for the installation of new seals.
Remove the old seals from the caliper using a seal pick or a small flat - head screwdriver. Be careful not to scratch the caliper bore while removing the seals. Clean the caliper bore thoroughly using a brake cleaner and a lint - free cloth. Make sure there are no dirt, debris, or old seal material left in the bore.
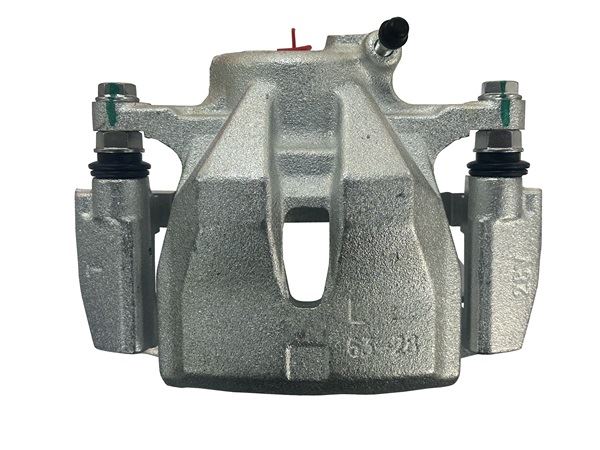

Step 6: Install New Seals or Replace the Caliper
If the caliper body is in good condition, you can simply install new seals. Lubricate the new seals with a small amount of brake fluid before installing them into the caliper bore. Make sure the seals are properly seated and not twisted.
However, if the caliper body is damaged, such as having a crack or a hole, it's best to replace the entire caliper. As a supplier, we can provide you with high - quality replacement calipers that are designed to meet or exceed OEM specifications.
Step 7: Reassemble and Install the Caliper
After installing the new seals or the replacement caliper, reassemble the caliper. Make sure the piston is properly seated in the bore and the brake pads are correctly positioned.
Carefully place the caliper back onto the brake rotor and secure it with the bolts. Tighten the bolts to the manufacturer's recommended torque specifications using a torque wrench.
Step 8: Bleed the Brake System
Bleeding the brake system is a crucial step to remove any air bubbles that may have entered the system during the repair process. Air in the brake lines can cause a spongy brake pedal and reduce the effectiveness of your brakes.
To bleed the brakes, you'll need a brake bleeder kit. Start by filling the brake fluid reservoir to the appropriate level. Then, have an assistant press the brake pedal slowly and hold it down. Open the bleeder valve on the caliper slightly, allowing the air and brake fluid to escape into the catch basin. Close the bleeder valve before your assistant releases the brake pedal.
Repeat this process several times until no more air bubbles come out of the bleeder valve. Make sure to keep an eye on the brake fluid level in the reservoir and refill it as needed.
Step 9: Test the Brakes
Once you've bled the brakes, it's time to test them. Start your vehicle and slowly pump the brake pedal a few times to build up pressure. Then, take your vehicle for a short test drive in a safe area. Pay close attention to the feel of the brake pedal. It should be firm and responsive. If you notice any issues, such as a spongy pedal or a pulling to one side when braking, stop the vehicle immediately and re - check your work.
Conclusion
Fixing a leaking car wheel brake caliper is a task that requires some mechanical knowledge and the right tools. By following these steps, you can safely and effectively repair a leaking caliper and restore the performance of your vehicle's brakes.
If you're unsure about any part of the repair process or if you need high - quality brake calipers and parts, don't hesitate to reach out to us. As a leading car wheel brake caliper supplier, we have a wide range of products to meet your needs. Whether you need a 19 - B6271 Suitable For Sorento Left Rear Caliper, a Toyota Exclusive Left Front Caliper, or Front Brake Calipers with Brackets (18 - B4728, 18 - B4729), we've got you covered. Contact us today to discuss your requirements and start the procurement process.
References
- Chilton's Auto Repair Manuals
- Haynes Repair Manuals
- Vehicle manufacturer's service manuals


