


Ensuring the correct installation of a brake caliper piston for Kia vehicles is a critical process that directly impacts the safety and performance of the braking system. As a trusted supplier of brake caliper pistons for Kia, I understand the importance of this procedure and am here to guide you through it step - by - step.
Understanding the Brake Caliper Piston for Kia
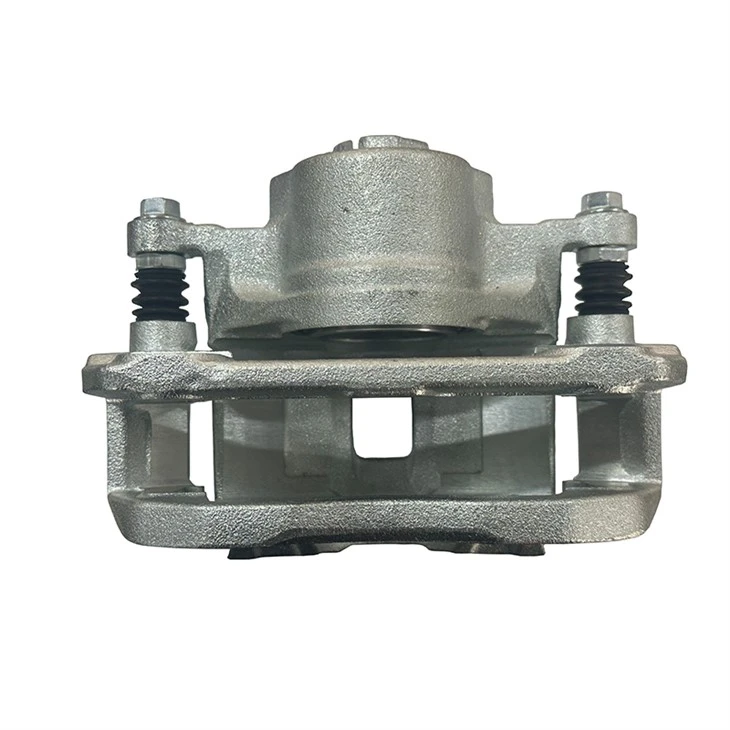
Before we delve into the installation process, it's essential to understand what a brake caliper piston does. The brake caliper piston is a key component of the disc brake system. When you press the brake pedal, hydraulic pressure is sent to the caliper, which then forces the piston to push the brake pads against the brake rotor. This friction between the pads and the rotor slows down or stops the vehicle.
Kia vehicles are known for their reliability and performance, and using high - quality brake caliper pistons is crucial to maintain these qualities. Our brake caliper pistons for Kia are designed to meet or exceed OEM specifications, ensuring a perfect fit and optimal performance.
Pre - installation Checks
Gather the Necessary Tools
Before you start the installation, make sure you have all the required tools. These typically include a socket set, a brake caliper piston tool, a brake fluid syringe, a torque wrench, and a C - clamp. Having the right tools on hand will make the installation process smoother and more efficient.
Inspect the New Piston
Carefully examine the new brake caliper piston for any signs of damage or defects. Check the piston's surface for scratches, dents, or unevenness. A damaged piston can lead to improper braking performance and may even cause the caliper to fail. If you notice any issues with the piston, contact our support team immediately, as we offer high - quality replacement parts.
Check the Caliper Bracket
Inspect the caliper bracket for any signs of wear, damage, or corrosion. Clean the bracket thoroughly and remove any rust or debris. A damaged bracket can affect the alignment of the caliper and piston, leading to uneven brake pad wear and reduced braking efficiency.
The Installation Process
Remove the Old Caliper
- Safely Raise the Vehicle: Use a jack to lift the Kia vehicle and secure it on jack stands. Make sure the vehicle is stable and level before proceeding.
- Remove the Wheel: Use a socket set to remove the lug nuts and take off the wheel.
- Disconnect the Brake Line: Use a flare nut wrench to loosen the brake line fitting on the caliper. Place a brake fluid syringe under the fitting to catch any brake fluid that may spill.
- Remove the Caliper Bolts: Use a socket set to remove the bolts that hold the caliper to the bracket. Carefully lift the caliper off the rotor and hang it using a wire or bungee cord to prevent damage to the brake line.
Remove the Old Piston
- Use a Piston Tool: Insert the brake caliper piston tool into the caliper bore and turn it counter - clockwise to retract the old piston. This will make it easier to remove the piston from the caliper.
- Clean the Caliper Bore: Once the old piston is removed, clean the caliper bore using a brake cleaner and a lint - free cloth. Remove any dirt, debris, or old brake fluid from the bore.
Install the New Piston
- Lubricate the Piston: Apply a thin layer of high - temperature brake grease to the new piston. This will help the piston move smoothly in the caliper bore and prevent it from sticking.
- Insert the Piston: Carefully insert the new piston into the caliper bore. Make sure the piston is properly aligned and seated in the bore.
- Re - assemble the Caliper: Re - install the caliper on the bracket and tighten the caliper bolts to the manufacturer's specified torque using a torque wrench.
Reconnect the Brake Line
- Clean the Fitting: Clean the brake line fitting and the caliper port using a brake cleaner.
- Re - attach the Line: Use a flare nut wrench to tighten the brake line fitting on the caliper. Make sure the fitting is tight but not over - tightened.
Bleed the Brakes
- Fill the Master Cylinder: Fill the brake master cylinder with fresh brake fluid.
- Bleed the System: Have an assistant press the brake pedal slowly and hold it down. Open the bleeder valve on the caliper slightly to allow air and old brake fluid to escape. Close the valve before the pedal is released. Repeat this process until all the air is removed from the brake line.
Post - installation Checks
Check the Brake Fluid Level
After bleeding the brakes, check the brake fluid level in the master cylinder. Add more brake fluid if necessary to bring the level to the recommended mark.
Test the Brakes
Lower the vehicle from the jack stands and install the wheel. Tighten the lug nuts to the proper torque. Start the vehicle and test the brakes at low speeds in a safe area. Make sure the brakes feel firm and responsive. If you notice any issues, such as a spongy brake pedal or uneven braking, stop the vehicle immediately and re - check the installation.
Common Installation Mistakes to Avoid
Over - tightening the Caliper Bolts
Over - tightening the caliper bolts can cause the caliper to warp, leading to uneven brake pad wear and reduced braking performance. Always use a torque wrench to tighten the bolts to the manufacturer's specified torque.
Not Bleeding the Brakes Properly
Failing to bleed the brakes correctly can result in air bubbles in the brake lines, which can cause a spongy brake pedal and reduced braking efficiency. Make sure to follow the bleeding procedure carefully to remove all the air from the system.
Using the Wrong Tools
Using the wrong tools can damage the caliper, piston, or other brake components. Always use the recommended tools for the installation process.
Related Products
If you're interested in exploring other brake - related products, we also offer 18 - B5031 Chevrolet Specific Brake Calipers, Car Accessories Brake Caliper 18 - 4774, and Front Brake Caliper for Acura CL 2003 - 01 & RL 2004 - 99 - Cardone 19 - B2584,19 - B2585. These products are designed to meet the highest standards of quality and performance.
Conclusion
Ensuring the correct installation of a brake caliper piston for Kia vehicles is a process that requires attention to detail and the use of proper tools. By following the steps outlined in this guide, you can install the piston correctly and maintain the safety and performance of your Kia's braking system.
If you have any questions or need further assistance with the installation process, or if you're interested in purchasing our high - quality brake caliper pistons for Kia, please feel free to contact us. We're here to help you make the right choice for your vehicle's braking needs.
References
- "Automotive Brake Systems" by William H. Crouse and Donald L. Anglin
- Kia vehicle repair manuals


